 Pin it
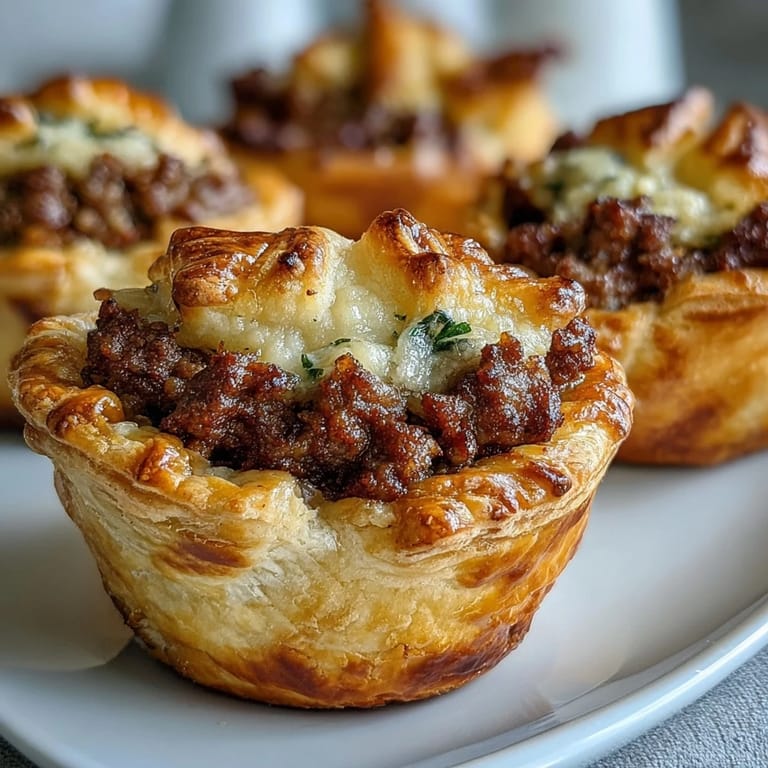
 The kitchen smelled like butter and warm spices the afternoon I finally nailed the pastry for these little pies. I'd been fighting with the dough all morning, convinced it hated me, until I realized I'd been overworking it like some kind of anxious baker. Once I let the cream cheese do its job and stopped fussing, everything came together in this tender, flaky shell that practically melted around the filling. Now every time I fold one shut with a fork, I feel like I'm tucking in a tiny, delicious secret.
I made a double batch for a winter potluck once and watched them disappear in under ten minutes. People kept coming back to the table, pretending they were just passing by, then snatching another one when they thought no one was looking. My friend Sarah admitted she ate five and called me the next day for the recipe.
Ingredients
- Cream cheese, softened: This is what makes the pastry so tender and rich, let it sit out for about 20 minutes so it blends smoothly with the butter.
- Unsalted butter, cold and diced: Keep it cold until you mix it in, the little pockets of butter create that flaky texture we're after.
- All purpose flour: The backbone of the dough, measure it carefully and don't pack it down or you'll end up with tough pastry.
- Salt (for pastry): Just enough to balance the richness and bring out the buttery flavor without making it taste salty.
- Ground beef: I like 80/20 for flavor, but if you go leaner just add a bit more butter to the filling so it doesn't dry out.
- Small onion, finely chopped: Dice it small so it melts into the filling, no one wants a big chunk of onion in a tiny pie.
- Garlic, minced: Fresh is best here, the flavor blooms in the butter and makes everything smell incredible.
- Ground allspice: This is the secret warmth in tourtière, it's subtle but unmistakable once you know it's there.
- Ground cinnamon: Just a whisper, it rounds out the spices without making the filling taste like dessert.
- Ground cloves: A little goes a long way, this adds depth and a hint of that old fashioned spiced meat pie magic.
- Dried thyme: Earthy and savory, it keeps the filling grounded and reminds you this is dinner, not a cookie.
- Salt and black pepper: Season boldly here, the pastry is mild so the filling needs to carry the flavor.
- Beef broth: It keeps the meat moist and adds a layer of richness, let it simmer down until it's almost gone.
- Fresh parsley, chopped: Optional but worth it, a little brightness at the end wakes up all those warm spices.
- Unsalted butter (for filling): Sauté the onions in this, it's a small detail that makes a big difference in flavor.
- Egg, beaten: Brushed on top for that glossy golden finish, it makes them look as good as they taste.
Tired of Takeout? 🥡
Get 10 meals you can make faster than delivery arrives. Seriously.
One email. No spam. Unsubscribe anytime.
Instructions
- Mix the pastry dough:
- Blend the cream cheese and butter until they're smooth and creamy, then stir in the flour and salt just until it comes together in a shaggy dough. Divide it in half, flatten each piece into a disk, wrap them up, and let them chill for at least 30 minutes so they're easy to roll.
- Cook the beef filling:
- Melt a tablespoon of butter in a skillet and cook the onion until it's soft and translucent, then add the garlic for just a minute until it smells amazing. Toss in the ground beef and break it up as it browns, then stir in all the spices, pour in the broth, and let it simmer until the liquid is mostly gone and the filling is rich and thick.
- Cool and finish the filling:
- Take the skillet off the heat, stir in the parsley if you're using it, and let the whole thing cool down while you preheat your oven to 200°C (400°F). Line two baking sheets with parchment so nothing sticks.
- Roll and cut the pastry:
- On a floured surface, roll out one disk of dough until it's about 3 mm thick, then cut out rounds with a 7 cm cutter. Gather the scraps, re roll, and keep going until you've used it all, then repeat with the second disk.
- Assemble the mini pies:
- Lay half the rounds on your prepared baking sheets, spoon a heaping teaspoon of filling onto each one, then brush the edges with a little water. Top with another round, press the edges together with a fork to seal, and brush the tops with beaten egg before cutting a tiny slit in each one.
- Bake until golden:
- Slide the trays into the oven and bake for 18 to 22 minutes, until the tops are shiny and golden brown. Let them cool for a few minutes before you serve them, or you'll burn your tongue on the filling like I always do.
 Pin it
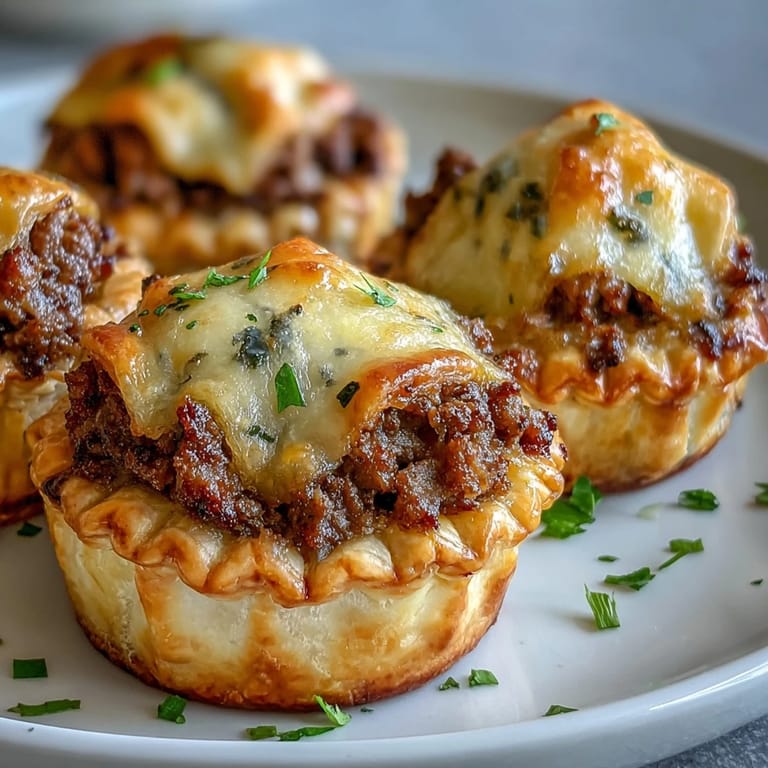
 There's something about handing someone a warm tourtière straight off the tray and watching their face light up when they bite into it. It happened at a family gathering last December when my cousin's new boyfriend nervously tried one and then asked if he could have three more. My aunt winked at me and said I'd just guaranteed he'd show up to every holiday from now on.
Making Them Ahead
I almost always make these in stages because doing it all at once feels like too much. The pastry dough keeps beautifully in the fridge for up to two days wrapped tight in plastic, and the filling actually tastes better the next day after the spices have had time to mingle. You can even assemble the whole batch, freeze them unbaked on a tray, then transfer them to a freezer bag and bake them straight from frozen, just add a few extra minutes to the oven time.
Serving Suggestions
These little pies are perfect on their own, but I love putting out a bowl of cranberry chutney or some grainy Dijon mustard for dipping. The tartness cuts through the richness of the pastry and beef in a way that makes you want to eat just one more. If you're feeling fancy, a small arugula salad with a lemon vinaigrette on the side turns them into a light lunch instead of just an appetizer.
Storing and Reheating
Leftover tourtières (if you're lucky enough to have any) keep in the fridge for about three days in an airtight container. I reheat them in a 180°C (350°F) oven for about 10 minutes to crisp up the pastry again, the microwave makes them soggy and sad. If you froze them after baking, let them thaw in the fridge overnight and then warm them up the same way.
- Brush the tops with egg wash right before baking, not before freezing, or it gets weird and streaky.
- Label your freezer bag with the date and baking instructions so future you doesn't have to guess.
- If the edges brown too fast in the oven, tent them loosely with foil for the last few minutes.
 Pin it
 These little pies have become my go to whenever I need to bring something that feels special without stressing myself out. They're the kind of food that makes people linger in the kitchen, and honestly, that's my favorite part.
Recipe FAQ
- → Can I make the pastry dough ahead of time?
Yes, the cream cheese pastry can be made up to 2 days in advance. Keep it wrapped tightly in plastic wrap and refrigerated until ready to use.
- → What spices give tourtières their distinctive flavor?
The signature flavor comes from a blend of warm spices including allspice, cinnamon, cloves, and thyme, which complement the savory beef filling perfectly.
- → Can I freeze these mini tourtières?
Yes, you can freeze them either before or after baking. Freeze unbaked tourtières on a baking sheet, then transfer to a freezer bag. Bake from frozen, adding a few extra minutes to the cooking time.
- → What can I serve alongside these appetizers?
Mini tourtières pair wonderfully with cranberry chutney, Dijon mustard, or a tangy fruit preserve. They also complement cheese platters and charcuterie boards nicely.
- → How do I prevent the pastry from becoming soggy?
Ensure the beef filling is completely cooled before assembling, and cook it until most of the liquid has evaporated. Sealing the edges well with a fork also helps keep the filling contained.
- → Can I use a different meat for the filling?
Absolutely. Ground pork, turkey, or a combination of beef and pork work well. Adjust the cooking time as needed based on the meat you choose.