 Pin it
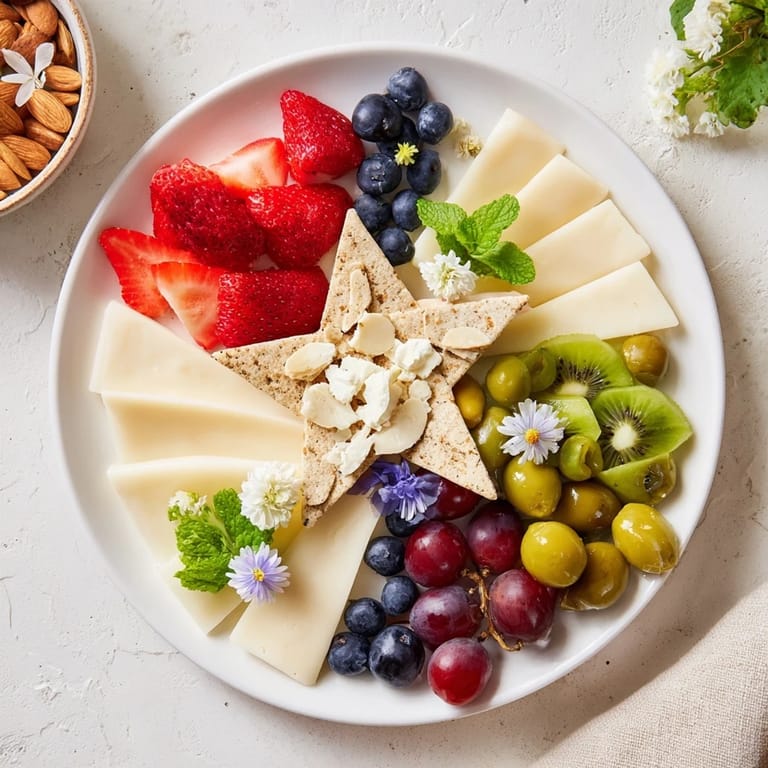
 I still remember the moment a friend brought a platter to my dinner party that stopped everyone mid-conversation. It wasn't just beautiful—it was a puzzle. Negative space design, she called it. The empty spaces between the cheeses and fruits formed a perfect star, and I realized right then that food could be art. That night, I decided I had to master this technique, and now it's become my secret weapon for leaving guests absolutely speechless.
I'll never forget my cousin's wedding shower when I brought this platter with her initials in negative space. The room actually gasped. Watching her face light up as she realized the design spelled out 'JM' made every minute of careful arrangement worth it. That's when I understood that this isn't just appetizers—it's a love letter made from cheese and fruit.
Ingredients
- Brie cheese: The creamy anchor that crowds around your design. Slice it thick enough to hold its shape but thin enough to be elegant. I've learned that cold cheese cuts cleaner than room temperature.
- Manchego cheese: Its firm texture and pale color create beautiful contrast. This Spanish beauty doesn't crumble like softer cheeses, so it's your reliable friend for structure.
- Goat cheese: Crumbled and piled in small mounds, it adds unexpected texture and a subtle tang. The crumbles work wonderfully as filler material around your negative space.
- Seedless red grapes: Pop these whole or halved depending on your design's scale. They're like little jewels that catch the light.
- Strawberries: Halve them for a clean look, and arrange them cut-side down so you see their gorgeous interior. They're structural and beautiful simultaneously.
- Kiwi: Slice thin and overlap like scales. The green is striking against warmer tones, and the seeds add visual interest.
- Blueberries: These tiny orbs are your precision tool. Use them to fill small gaps and define edges where you need sharpness.
- Thin crackers: Choose varieties that complement your cheese selection. Arrange them standing at angles for height variation.
- Roasted almonds: These add earthy texture and a warm golden tone. Pile them in loose clusters rather than spreading thin.
- Green olives: Pitted and halved, they bring a savory punch and dark color that grounds the entire composition.
- Fresh mint leaves: Save these for the very end. They're your final flourish that says 'I have refined taste.'
- Edible flowers: Optional but transformative. They elevate the entire presentation into art gallery territory.
Tired of Takeout? 🥡
Get 10 meals you can make faster than delivery arrives. Seriously.
One email. No spam. Unsubscribe anytime.
Instructions
- Choose Your Secret Design:
- Close your eyes and imagine what shape would make your guests smile. A star? Your guest of honor's initials? A geometric pattern? Sketch it on parchment paper first—this becomes your roadmap. I like to test a few designs before committing because this moment sets the entire tone.
- Set Up Your Canvas:
- Lay your parchment guide on the platter, positioning it exactly where you want the negative space to appear. Step back and look at it from different angles. This is like framing a photograph—the placement matters more than you might think.
- Build Your Cheese Foundation:
- Start arranging cheeses in clusters around the outlined design, being intentional about where each type goes. Manchego on one side, Brie in another corner, goat cheese mounds scattered throughout. Leave the negative space absolutely clear—this discipline is what makes the design pop.
- Paint With Fruit:
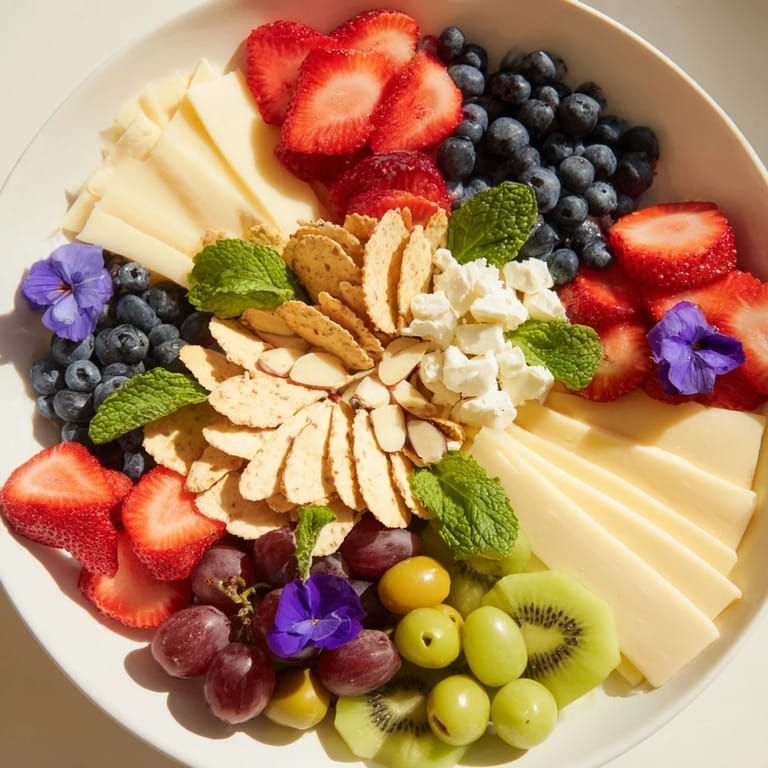
- Fill the remaining gaps with your fruit palette. This is where the magic happens. Place strawberry halves in artistic clusters, overlap kiwi slices, scatter grapes with intention. Each piece should feel placed, not dropped. Let your eye guide you toward balance.
- Add Textural Layers:
- Pile almonds in small mountains and dot olives throughout. Think of these as shadows and highlights that add dimension to your composition. The texture should make someone want to run their fingers across the platter.
- Reveal Your Masterpiece:
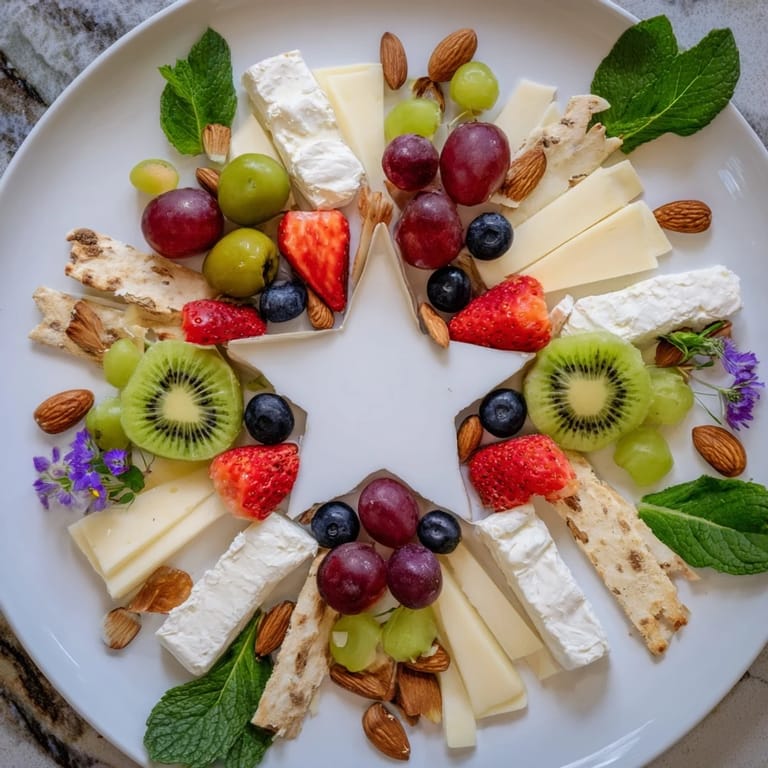
- This is the moment I live for. Carefully peel away the parchment guide, revealing the clean negative space beneath. Breathe. If it didn't work perfectly, you can still arrange garnishes to guide the eye, but typically the shape emerges beautifully.
- Crown It With Grace:
- Scatter fresh mint leaves and edible flowers across the platter, especially around the negative space. These final touches whisper 'this was made with care.' Don't overdo it—restraint is elegant.
- The Presentation Moment:
- Set the platter down and watch people notice it before they eat it. Encourage them to admire the design first. The anticipation makes everything taste better somehow.
 Pin it
 My neighbor saw this platter at a dinner party and asked me to make one for her daughter's graduation. When I delivered it, the girl literally cried. Food is never just food when it's made with intention and creativity. This platter became her favorite memory from that day—not because of how it tasted, but because someone took the time to turn her celebration into edible art.
Making It Your Own
This recipe is your playground. I've done dessert versions where I replaced cheeses with dark chocolate chunks, used dried apricots and figs instead of fresh fruit, and scattered pistachios where the almonds were. The structure stays the same, but your ingredients become your voice. One winter, I made an entirely white version with white chocolate, white cheese, coconut flakes, and white berries. It looked like snow, and everyone asked how I did it.
The Pairing Philosophy
Serve this with sparkling wine and watch the conversation flow. There's something about beautiful food that makes people relax and talk more freely. I've started champagne celebrations and crisp white wine dinners with this platter as the opening act. It sets the tone for the entire evening. The cheese needs something acidic to cut through the richness, and the fruit benefits from that delicate fizz that makes everything feel celebratory.
Design Inspiration & Secrets
The negative space technique feels intimidating until you realize it's just intentional emptiness. Some of my favorite designs came from unexpected places—a child's drawing of a moon, the logo from a favorite restaurant, even a fingerprint magnified and traced. Start simple with geometric shapes. A triangle is forgiving. A heart is timeless. Once you've done a few, your confidence builds and you start thinking in negative space about everything.
- Keep your design relatively simple for your first attempt—a star works beautifully and forgives small imperfections
- Scale matters enormously: test your design dimensions against your actual platter to avoid cramped or wasted space
- Take a photo before serving so you capture the design at its peak, before guests start helping themselves
 Pin it
 Every time I create one of these platters, I'm reminded that cooking is as much about the joy of creation as it is about feeding people. This recipe asks you to slow down, be intentional, and create something beautiful. Your guests will taste the care in every bite.
Recipe FAQ
- → What is negative space plating?
Negative space plating involves arranging ingredients to leave intentional empty areas that create shapes or designs, enhancing visual appeal.
- → How do I keep the negative shapes clear?
Use parchment paper as a guide to outline shapes, then carefully place ingredients around them, removing the guide to reveal clean spaces.
- → Can this platter be adapted for dessert?
Yes, substitute cheeses and crackers with chocolates, biscotti, and dried fruits to create a sweet variation of the platter.
- → What pairings complement this platter?
Sparkling wine or a crisp white wine pairs beautifully, balancing the flavors of cheeses, fruits, nuts, and olives.
- → Are there allergen considerations?
This platter contains milk, tree nuts, and gluten. Use gluten-free crackers to accommodate dietary needs and check labels carefully.