 Pin it
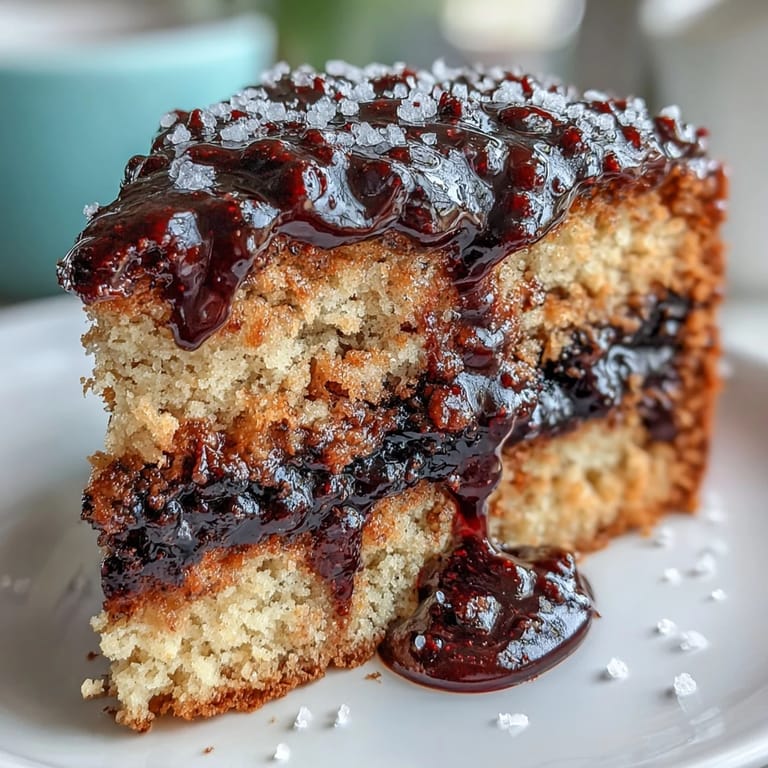
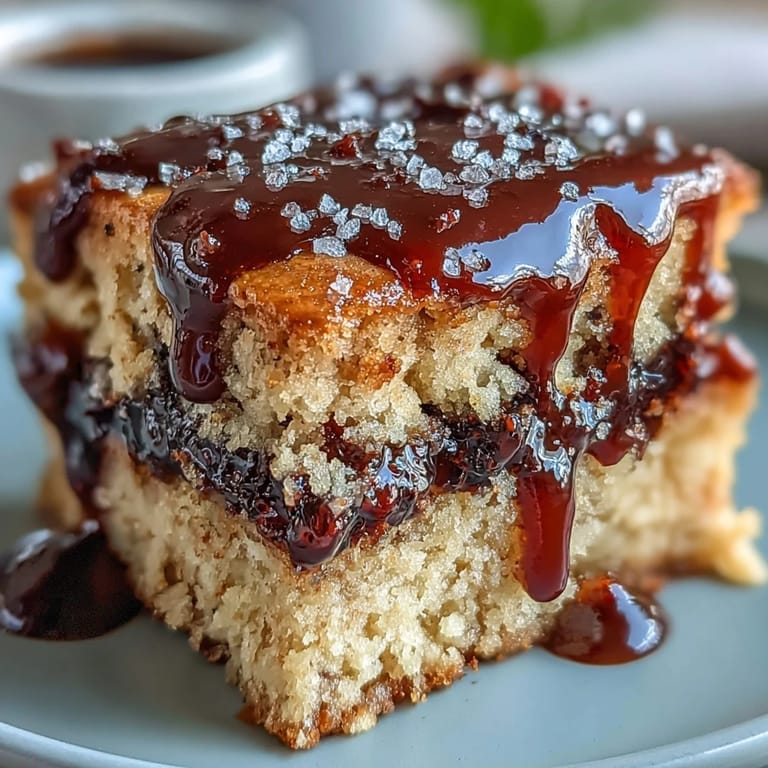
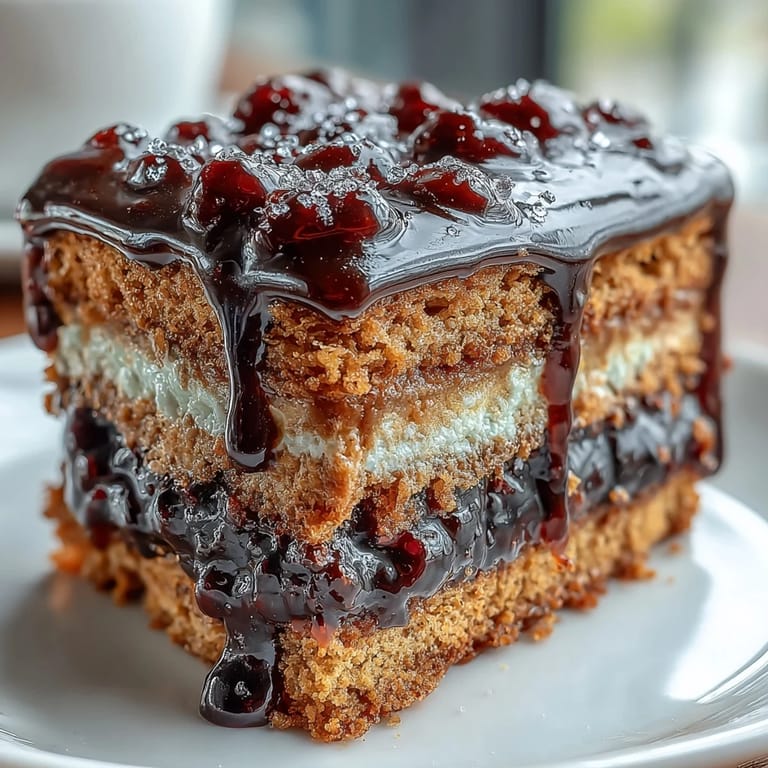
 My neighbor brought over a jar of homemade black currant jam last summer, and I stood in my kitchen staring at it like it held the secrets of the universe. Peanut butter and jelly had always been comfort food, but something about that deep purple jam made me wonder what would happen if I treated it like a fancy dessert instead. That afternoon, I built this cake, layering creamy peanut butter cake with that tart jam center, and the result felt like childhood and sophistication having a conversation on the same plate.
I made this for a dinner party where my friend mentioned being tired of the same old chocolate desserts, and watching her face light up when she tasted the interplay of peanut butter and black currant felt like small magic. Someone asked for the recipe before dessert was even finished, which never happens at my table.
Ingredients
- All-purpose flour (1 1/2 cups): This is your foundation, and whisking it together with the leavening agents prevents lumps and ensures an even crumb throughout the cake.
- Baking powder and baking soda (1 tsp and 1/2 tsp): The combination lifts the cake gently without making it too airy, giving you that tender, moist texture that holds up to the jam layer.
- Salt (1/4 tsp): Never skip this; it makes the peanut butter flavor sing instead of feeling one-dimensional.
- Unsalted butter and creamy peanut butter (1/2 cup and 3/4 cup): The butter adds richness while the peanut butter is the star, so use a good quality one you'd actually eat straight from the jar.
- Granulated sugar (1 cup): Beat this with the butter and peanut butter until the mixture looks pale and fluffy, which incorporates air and creates a tender crumb.
- Large eggs (2): Add these one at a time, beating well between each addition so they emulsify properly into the batter.
- Vanilla extract (1 tsp): A small amount that rounds out the flavor without competing with the peanut butter.
- Whole milk (1/2 cup): The acidity helps activate the baking soda, and alternating it with the dry ingredients keeps the batter smooth and lump-free.
- Black currant jam (1/2 cup): Use preserves rather than jelly if you can find them; they hold their place better and taste more like real fruit.
- Fresh or frozen black currants (1 cup): Frozen work beautifully for the sauce and often taste more vibrant than fresh ones shipped long distances.
- Lemon juice (1 tsp): This brightens the sauce and keeps it from tasting one-note sweet.
Tired of Takeout? 🥡
Get 10 meals you can make faster than delivery arrives. Seriously.
One email. No spam. Unsubscribe anytime.
Instructions
- Prepare your stage:
- Preheat the oven to 350°F and grease your 8-inch round pan generously, then line the bottom with parchment paper so your cake releases cleanly. This small step saves heartbreak later.
- Combine your dry ingredients:
- Whisk the flour, baking powder, baking soda, and salt together in a medium bowl, breaking up any lumps you find hiding in the flour. Set this aside and let it sit there peacefully while you work on the wet ingredients.
- Build your base:
- Beat the softened butter and peanut butter together until they become smooth and creamy, which takes about a minute of steady beating. Add the sugar gradually and keep beating until the mixture looks pale and fluffy, like you're whipping air into it; this usually takes three to four minutes and signals that fat and sugar have emulsified properly.
- Incorporate your eggs:
- Add the eggs one at a time, beating well after each addition so they fully incorporate and don't sit pooling on top. The mixture might look slightly curdled after the second egg, which is fine; it comes together when you add the flour.
- Add vanilla and fold in your flour:
- Mix in the vanilla extract, then alternate adding the flour mixture and milk, starting and ending with flour and mixing just until combined. This method prevents overdevelopment of gluten, which would make your cake tough instead of tender.
- Layer the batter and jam:
- Spread half the batter into your prepared pan, creating an even layer, then spoon the black currant jam across it, leaving a 1/2-inch border all around. Gently spread the remaining batter over the jam, trying not to push it down into the jam layer; use an offset spatula if you have one.
- Bake until golden:
- Bake for 30 to 35 minutes until a toothpick inserted into the cake (not through a jam pocket) comes out clean or with just a few moist crumbs. The cake will smell absolutely stunning and pull away slightly from the sides of the pan when it's ready.
- Cool with patience:
- Let the cake rest in the pan for 10 minutes, then invert it onto a wire rack and let it cool completely, which takes about an hour. Resist the urge to slice into it while warm; it's still setting inside and will crumble if you cut too early.
- Make your sauce:
- Combine the black currants, sugar, and water in a small saucepan and bring to a boil, stirring occasionally, then reduce heat and simmer for 8 to 10 minutes until it thickens and becomes syrupy. Stir in the lemon juice once the mixture cools slightly, and you'll taste how the acidity transforms it from sweet to balanced.
 Pin it
 There's a moment when you pull this cake from the oven and the kitchen fills with the smell of toasted peanut butter and tart fruit, and that's when dessert stops being about technique and becomes about the joy of making something with your own hands. That's when this cake becomes more than a recipe.
The Magic of Peanut Butter in Baking
Peanut butter brings depth to cake in ways that neutral oils never could; it adds moisture and a subtle nutty flavor that lingers on your palate. When you cream it together with butter, you're building an emulsion that traps air, which is exactly what makes this cake rise and stay tender. I learned to use creamy peanut butter rather than natural because the added emulsifiers help the batter stay smooth and prevent greasiness.
Why Black Currant Matters
Black currant has a complexity that other berries don't quite capture; it's tart and slightly floral at the same time, which makes it the perfect counterpoint to rich peanut butter. The tartness cuts through the heaviness so that each bite feels bright instead of cloying. Once you use black currant in baking, you start finding excuses to use it in everything.
Assembly and Serving Thoughts
This cake is just as delicious at room temperature as it is slightly chilled, so make it ahead without stress and serve it whenever you're ready. The sauce keeps in the refrigerator for about a week, so you can make it the day before if that helps with timing. Serve each slice drizzled generously with sauce, and watch how the colors create something that looks almost too pretty to eat.
- If your kitchen is very warm, chill the cake for a bit before slicing so it holds its shape cleanly on the plate.
- Leftover cake keeps covered at room temperature for two days, and the flavors actually deepen slightly as it sits.
- A scoop of vanilla ice cream melting into warm cake and black currant sauce is not a bad way to finish a meal.
 Pin it
 Making this cake feels like you're in on a secret, like you've taken something casual and made it special without losing any of its soul. It's the kind of dessert that people remember, and that's really what cooking is about.
Recipe FAQ
- → Can I use other berry jams instead of black currant?
Absolutely. Raspberry, blackberry, or even strawberry jam work beautifully. The key is choosing something tart to balance the rich peanut butter cake.
- → How should I store this cake?
Keep it covered at room temperature for up to 3 days. The sauce can be stored separately in the refrigerator and reheated gently before serving.
- → Can I make this cake gluten-free?
Yes. Substitute the all-purpose flour with a 1:1 gluten-free flour blend. Ensure your baking powder and other ingredients are certified gluten-free.
- → What's the best way to serve this?
Serve warm or at room temperature with the black currant sauce drizzled over each slice. A glass of cold milk makes the perfect pairing.
- → Can I freeze this cake?
Yes. Wrap the cooled cake (without sauce) tightly in plastic and freeze for up to 3 months. Thaw overnight at room temperature before serving.
- → Why does the jam sink during baking?
Leaving a 1/2-inch border around the edges and spreading remaining batter gently over the jam helps prevent sinking. The jam layer should be evenly spread, not too thick.